Network With Me!

made by Leeloumade by Leeloumade by Leeloumade by Leelou

Monday, October 24, 2011

Yet Another Acrylic Birthday Cup

Been awhile since I've posted, don't have much time today, but wanted to at least post something.  I'm going to try to post at least once per week, but with the holidays coming up I don't know if I will be able to keep that commitment, but I will try.

October 29th is my sister's birthday and she is a girly, girly that loves bling so without further ado here is her cup.

Tumbler for sister
Click Image to view larger
Until next time...

Blogger C-Sig

Saturday, September 17, 2011

Get Crafty With It

Zumba Set
So It's been awhile since I posted.  Been kinda busy at work which didn't give me a lot of time to play. But my creative juices are flowing always, when I wake up, when I'm driving, when I have free time.  My youngest sister is a Zumba instructor and her birthday was coming up. Since she has a unique name I know she would never find anything personalized just for her right off the rack so my thought process began.

I captured the Zumba symbol and put it on a shirt and drink cup for her to wear when she is teaching her class. She was really happy with it as a matter of fact she said she LOVED IT!  My work was done.

Happy Birthday Girl!!


Until next time...

Blogger C-Sig

Wednesday, September 7, 2011

Hoppy Bookmarks inspired by Jin

Under A Cherry Tree by Jin Yong has got to be one of my favorite sites when it comes to paper crafting.  Her creativity is well just...AWESOME!!!

I really don't know how she comes up with the things she does. I'd like to borrow her brain just for a day and soak up her thought process when she thinks up these clever ideas and turns them into reality.

Well here is my take on her post for some really cute bookmarks. Because I love reading and would love for everyone in the world to read more I decided to try my hand at creating some myself.  In Jin's version she made them more 3-D, but because I was making them for a class of 1st graders, I didn't want them to pull off pieces with there inquisitive minds and busy fingers so I did mine as a print-n-cut using Make The Cut and my Silhouette SD.  I made 20 of those little rascals and they were a blast to make.

I pretty much followed her directions on making the "U" shape for the slit, it was very easy and the visual help me put it together, but all that gluing UGH!  I had to cut each piece twice and glue together because the card stock I had was a little to flimsy and I wanted a sturdy base for the little froggies to sit on.

I'm mailing them today....can't wait til my sister gets them.

Here are my results:

Bookmarks - Close Up Reading Bookmarks

Thanks Jin for your creativness you are truly an inspiration.

Until next time...

Blogger C-Sig

Sunday, September 4, 2011

Sympathy Card w/ Elements

Sympathy Card
Click image for larger view
of finished card
Last week a dear friend of mine lost his sister to cancer. On those moments you're not sure what words would comfort, but I wanted him to know I was thinking of him and his family.  I love making personalized cards with special messages in them.  With this one I used Lettering Delights Graphics and my trusty Make the Cut Software.

The initial elements came from LD's "Butterflies and Blossoms" collection (butterfly and branch) and the other elements came from using basic shapes in MTC and fonts Another Typewriter & Satisfaction.  For a distinguished background element, I created a circle, copy and pasted in place, the top circle I reduced in size and stacked.  I used the join feature for the two circles and then duplicated it with a -.05 spacing, I got a wonderful circular pattern which I welded together.  I changed the look of the circles by adding one of Lettering Delights patterned tiles from their 100 tiles pack. I adjusted the color using the "advance/color adjust" option. The background square also used a pattern tile that I adjusted the color and rotated 45 degrees.  Printed it all onto photo card stock and cut out using my Silhouette SD print and cut feature (the butterfly was printed and cut twice for 3-D affect).  This particular card gave me a hard time, I had to keep restarting both the Silhouette SD and MTC so that the registration marks would read correctly. I usually create a "mock-up" before I put my elements together so I can have an idea on how the card will look complete.

Here are some images of how it was laid out:
Sympathy Card Mock-Up
Card Mock-Up
Elements of Sympathy Card 1
Card Elements
Elements of Sympathy Card 2
Card Circle Element

Until Next Time...

Blogger C-Sig

Monday, August 29, 2011

Custom Acrylic Cups

Custom Acrylic Cups
Click to Enlarge
So last week I had to get busy and complete an order for some cups. They were all created completely in Make-The-Cut Software and cut out using my Silhouette SD. I have another 8 to do, but ran out of cups. My order should be arriving soon, can't wait because I love doing these personalized items.


Until next time...

Blogger C-Sig


Sunday, August 14, 2011

Personalized Cup

Olivia Cup - Front & Back
So as I said yesterday it's my aunt's birthday. I created a lovely card for her, but I wanted to give her something else personalized. I LOVE Personalized items because it makes gift giving well...personal. I had one of those 16oz. acrylic cups and decided to put her name and some flowers on it. That way there will be no mistaking whose cup it belongs to. She will always know her cup.


I have to put this in the mail Monday, of course her B-day is Today (8/14), but hey better late than never.

Until next time...

Blogger C-Sig

Friday, August 12, 2011

Happy Birthday Auntie

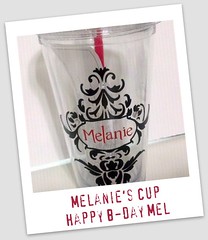
My aunt's birthday in on the 14th and of course I'm late putting something together for her AGAIN!  I live in Florida and she lives in Louisiana so needless to say this card will be a little late, but I know she is going to like it just because I made it. I'm the only one in the family who likes to craft.  I do have an excuse though, I was having a brain freeze and couldn't decide what I wanted to make.  Then I saw some graphics on this site: 
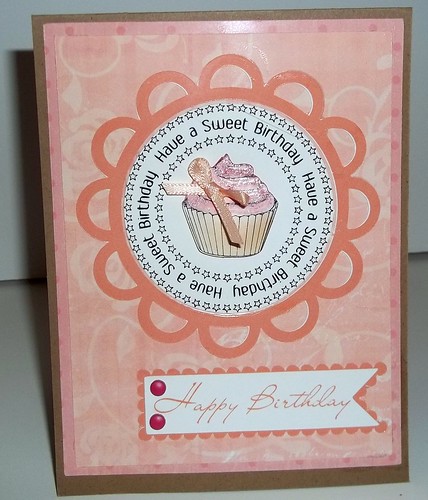
http://www.birdscards.com/ which I fell in love with, she has some really cute digital stamps and graphics.  I used her wonderful little cupcake image and "button" and I also used the paper pack from Lettering Delights called Cloud Nine and my favorite program of all times Make-The-Cut. Putting it together was fairly easy, but using the texture feature in MTC slowed my system down greatly. What should have taken me about 30 minutes took me and hour because of the lag and the drain on computer resources.  Hopefully this can be rectified next time by reducing the size of the images I used. Oh well live and learn.

Birthday Card
Click on Card to see larger

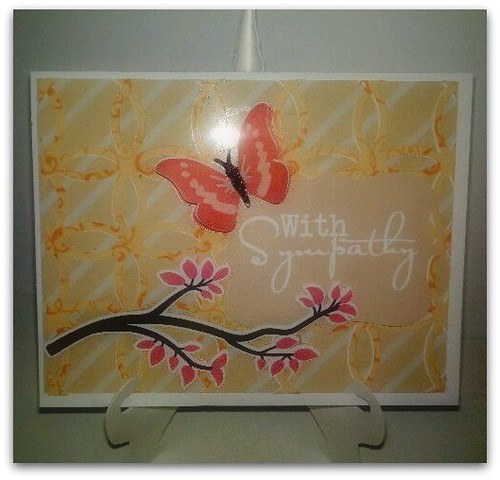
Here is the outcome of my "labor".  I'm pretty happy with the way it came out.  I used 8.5" x 11" Kraft Card stock from Michael's that I cut in half lengthwise and some photo paper I had lying around. I printed digital paper on photo paper, used scalloped design, cupcake, tag and tabs from Birdscards site.  I cut everything out using my Silhouette SD in print-n-cut mode and there you have it.  

I just have to think of something to say on the inside.  I always make a point when I send handmade cards to always write a personal note on the inside.  I do this because so many use email, texting and other forms of instant communication these days. No one writes anymore so I've made a conscience decision to always write personal notes in each of my cards.


Until next time. Happy Friday!!!
Blogger C-Sig